When we talk about our React Native setup in abstract, there are two kinds of “now draw The Tick” for iOS developers:
- How do I build this React Native as a CocoaPods setup?
- How do I get all the JavaScript tooling setup up?
We’re going to address the first part in this post. By the end of this post we’re going to get an Emission-like
repo set up for an existing OSS Swift iOS app called GitHawk. The aim being to introduce no
JavaScript tooling into GitHawk itself, and to only expose iOS-native UIViewControllers via a CocoaPod which is
consumed by GitHawk.
To do this we’re going to use the CocoaPods’ pod lib create template, and React Native’s react-native init to
make a self-contained React Native repo. It will export a JS file, and some native code which Podspec will
reference. This keeps the tooling complexity for iOS and React Native separate. Read on to start digging in.
So, I’m choosing to be annoying here. I will intentionally be adding $s before all of the commands, this is
specifically to slow you down and make you think about each command. This isn’t a quick tutorial you can skim in 2
minutes, running though it properly should take about an hour.
_You can also watch along with this YouTube video of me going through the tutorial at Artsy x React Native_.
Also, before you get started, it looks like you're using a really small screen, this post expects you would have a terminal around with useful tools for getting stuff done. I'm afraid without that, you're not going to get much out of it. I'd recommend switching to a computer.
What Are We Going To Do?
We will make a React Native components library (GitDawg) for an existing open-source iOS Swift Application (GitHawk). This reflects an existing app with a team who wants to experiment with React Native in a way that doesn’t affect the main codebase. In Artsy, GitDawg is Emission, and GitHawk is Eigen.
-
We will clone and set up GitHawk
-
We will use
pod lib createto make a library repo called GitDawg -
We will use
react-native initto make a React Native environment -
We will bundle the React Native code into our Pod’s asset folder
-
We will edit the Podspec for GitDawg, and then the Podfile for the example project to consume it
-
We will use cocoapods-fix-react-native to hotfix the React Native files
-
We will expose a UIViewController which corresponds to the default screen from
react-native initin our Pod -
We will change the storyboard reference to point to the UIViewController from our Pod, and run the simulator to see our welcome screen.
-
We will set up GitHawk to consume our new Pod
-
We will change GitHawk to show our new UIViewController instead of the bookmarks screen
-
We will edit GitDawg to act more like a development environment
GitHawk
Let’s get started by having a working copy of GitHawk. I’ll leave the README for GitHawk to do that, but
if you want to be certain you’re on the same version as me - I’m working from this commit
6dc2988d23d70eb0862d11f4a365bf47a87848c6.
Clone a copy of GitHawk, and get it running in your Simulator, should take about 5-10 minutes, you’ll need Xcode 9.3. Then we can move on to starting our components repo.
GitDawg JS
When you’re done with GitHawk, go back a folder so that you’re ready to create the GitDawg repo: $ cd ...
Pre-requisites
We need CocoaPods: $ gem install cocoapods.
We’re going to need node, and a dependency manager. If you run $ brew install yarn you will get both.
I’m running on node 8.9.x and yarn 1.5.x. Honestly, it shouldn’t matter if you’re on node 8, or 9. Yarn is
basically CocoaPods for node projects. If you’re wondering what the differences are between yarn and NPM,
then TLDR: there used to be some, but now there’s few. I stick with yarn because I prefer how the CLI works, and I
can easily read the lockfile it generates.
We need the React Native CLI, so let’s install it globally: $ yarn global add react-native-cli.
Starting with the Pod
We’re going to let CocoaPods create the initial folder for our project. Let’s set up your Pod:
$ pod lib create GitDawg

Cloning `https://github.com/CocoaPods/pod-template.git` into `GitDawg`.
Configuring GitDawg template.

------------------------------

To get you started we need to ask a few questions, this should only take a minute.

If this is your first time we recommend running through with the guide:
 - http://guides.cocoapods.org/making/using-pod-lib-create.html
 ( hold cmd and click links to open in a browser. )


What platform do you want to use?? [ iOS / macOS ]
 > iOS

What language do you want to use?? [ Swift / ObjC ]
 > ObjC

Would you like to include a demo application with your library? [ Yes / No ]
 > Yes

Which testing frameworks will you use? [ Specta / Kiwi / None ]
 > None

Would you like to do view based testing? [ Yes / No ]
 > No

What is your class prefix?
 > GD
I’d recommend using only Objective-C at this point, for simplicities sake. Swift is a great language, but I want tooling simplicity. Swift and React Native is [docs] though. We’re also not going to write enough native code to warrant the setup for testing. Plus, if we skip native testing then we can run CI on linux - which is basically instant in comparison.
This has made a new library. Let’s go into our project’s root with $ cd GitDawg. There shouldn’t be too much in
here:
$ ls
Example         GitDawg         GitDawg.podspec LICENSE         README.md         _Pods.xcodeproj
Because the core competency of the repo is the JavaScript, we’re going to rename the “GitDawg” folder in the root to
be about the CocoaPod instead of owning the name of the project. Run $ mv GitDawg Pod to do that.
We want to create our React Native project. I’m hard-coding my versions in these commands to try ensure this post lasts some time, but you never know what amazing changes the future brings. If things are broken, leave a comment at the bottom of this post.
Let’s create a GitDawg React Native project, and then rename the folder to src:
# Use the RN CLI to create a new RN app in the folder GitDawg
$ react-native init GitDawg --version react-native@0.54.4

# Rename the folder to src
$ mv GitDawg src

# Remove _Pods.xcodeproj as it's relevant for our pod
$ rm -rf _Pods.xcodeproj
We don’t want all our project files living in a sub-folder though, so let’s move a few of them back to the repo’s root, then remove some unused files.
# Copy the package metadata, deps, lockfile and dotfiles to root
$ mv src/package.json src/node_modules src/yarn.lock src/.* .

# Remove the ios and android scaffolds as we have the CP one
$ rm -rf src/ios src/android
Which should make your app’s folder look something like this:
$ ls
Example         GitDawg.podspec LICENSE         README.md       Pods        node_modules    package.json    src             yarn.lock

$ ls src/
App.js    __tests__ app.json  index.js
To ensure everything is still hooked up, let’s make sure that all of your tests are working in the new repo.
$ yarn test

yarn run v1.5.1
 PASS  src/__tests__/App.js
  ✓ renders correctly (176ms)

Test Suites: 1 passed, 1 total
Tests:       1 passed, 1 total
Snapshots:   0 total
Time:        1.392s
Ran all test suites.
✨  Done in 2.32s.
We’re now going to be done with our JavaScript side, basically is our React Native “hello world”. It’s a React
Native project that exposes a single component which says "Welcome to React Native!".
However, it’s going to take a bit of work before we can see it in action.
Deployment
We’re going to want to have this exposed to our native libraries, so we’re going to ship the bundled JavaScript as our library’s source code. We do this via the React Native CLI, and it’s going to place the file inside our Pod folder from earlier.
$ react-native bundle --entry-file src/index.js --bundle-output Pod/Assets/GitDawg.js --assets-dest Pod/Assets
It looks like this, when you run it via the sim:
GitDawg Pod
With that done, we can start looking at the native side of our codebase. We let pod lib create set up an Example
app for us to work with in the repo, which consumes a Podspec in the root. So we’re going to take a look at the
Podspec, and update it.
Our goal with the Example app is to set up an app exclusively for developing components in. In Artsy’s case, this app handles auth to the Artsy API and has a series of jump-off points for developing a component.
To get started we need to modify the CocoaPod this repo represents:
- Update our Podspec to handle React Native as a dependency, and our assets
- Add support for native compilation via CocoaPods with cocoapods-fix-react-native
- Create a single
UIViewControllersubclass for the Welcome Screen using the bundled React Native JS
We want to have our Podspec re-use the metadata from React Native to set up GitDawg’s dependencies. So replace
GitDawg.podspec with this:
require 'json'

# Returns the version number for a package.json file
pkg_version = lambda do |dir_from_root = '', version = 'version'|
  path = File.join(__dir__, dir_from_root, 'package.json')
  JSON.parse(File.read(path))[version]
end

# Let the main package.json decide the version number for the pod
gitdawg_version = pkg_version.call
# Use the same RN version that the JS tools use
react_native_version = pkg_version.call('node_modules/react-native')

Pod::Spec.new do |s|
  s.name             = 'GitDawg'
  s.version          = gitdawg_version
  s.description      = 'Components for GitHawk.'
  s.summary          = 'Components for GitHawk.'
  s.homepage         = 'https://github.com/orta/GitDawg'
  s.license          = { type: 'MIT', file: 'LICENSE' }
  s.author           = { 'orta' => 'orta.therox@gmail.com' }
  s.source           = { git: 'https://github.com/orta/GitDawg.git', tag: s.version.to_s }

  s.source_files   = 'Pod/Classes/**/*.{h,m}'
  s.resources      = 'Pod/Assets/{GitDawg.js,assets}'
  s.platform       = :ios, '8.0'

  # React is split into a set of subspecs, these are the essentials
  s.dependency 'React/Core', react_native_version
  s.dependency 'React/CxxBridge', react_native_version
  s.dependency 'React/RCTAnimation', react_native_version
  s.dependency 'React/RCTImage', react_native_version
  s.dependency 'React/RCTLinkingIOS', react_native_version
  s.dependency 'React/RCTNetwork', react_native_version
  s.dependency 'React/RCTText', react_native_version

  # React's dependencies
  s.dependency 'yoga', "#{react_native_version}.React"
  podspecs = [
    'node_modules/react-native/third-party-podspecs/DoubleConversion.podspec',
    'node_modules/react-native/third-party-podspecs/Folly.podspec',
    'node_modules/react-native/third-party-podspecs/glog.podspec'
  ]
  podspecs.each do |podspec_path|
    spec = Pod::Specification.from_file podspec_path
    s.dependency spec.name, "#{spec.version}"
  end
end
This Podspec is probably more complex then you’re used to, but it means less config. To validate the Podspec, use
$ pod ipc spec GitDawg.podspec and read the JSON it outputs. With the Podspec set up, it’s time to set up the
example project’s Gemfile and Podfile.
We’ll start with applying the React Native hot-fix plugin, sometimes a version of React Native is released that doesn’t support Swift frameworks (as Facebook doesn’t use Swift) and so you have to apply some patches to the code. I made a CocoaPods Plugin that handles the hot-fixes for you.
Start by making a Gemfile in the Example folder: touch Example/Gemfile
source 'https://rubygems.org'

gem 'cocoapods'
gem 'cocoapods-fix-react-native'
Then run $ bundle install in the Example folder, which will set up the ruby dependencies of cocoapods and
cocoapods-fix-react-native for your app. This makes it possible to reference "cocoapods-fix-react-native" in
your Podfile next.
$ cd Example
$ bundle install
We want to take the current Podfile and make sure that every React Native dependency comes from the folder
node_modules/react-native. We can do this using the :path operator to redeclare where you can find each Pod.
Note: we also extend the amount of subspecs for 'React' in this Podfile via subspecs: ['DevSupport'] - this
subspec is what provide the hot code reloading and other developer tools. You’ll want this, in here, it will mean
that the example app can be used as a dev environment, and your main app will only get a production environment.
So edit Example/Podfile to look like this:
platform :ios, '9.0'

node_modules_path = '../node_modules'
react_path = File.join(node_modules_path, 'react-native')
yoga_path = File.join(react_path, 'ReactCommon/yoga')
folly_spec_path = File.join(react_path, 'third-party-podspecs/Folly.podspec')
glog_spec_path = File.join(react_path, 'third-party-podspecs/glog.podspec')
double_conversion_spec_path = File.join(react_path, 'third-party-podspecs/DoubleConversion.podspec')

plugin 'cocoapods-fix-react-native'

target 'GitDawg_Example' do
  pod 'GitDawg', path: '../'

  # We want extra developer support in React inside this app
  pod 'React', path: react_path, subspecs: ['DevSupport']

  # We're letting CP know where it can find these Podspecs
  pod 'yoga', path: yoga_path
  pod 'Folly', podspec: folly_spec_path
  pod 'DoubleConversion', podspec: double_conversion_spec_path
  pod 'glog', podspec: glog_spec_path
end
Run the following to set up the React Native dependencies for your project.
$ bundle exec pod install
We need some native code to represent our Welcome component from the React Native template. Create two new files in
Pod/Classes, then re-create the CocoaPods project for it by pod installing again.
$ touch ../Pod/Classes/GDWelcomeViewController.h ../Pod/Classes/GDWelcomeViewController.m
$ bundle exec pod install
$ open GitDawg.xcworkspace
We’re going to make a pretty vanilla UIViewController, so declare it exists in the interface and then use an
RCTRootView as it’s self.view.
#import <UIKit/UIKit.h>

@interface GDWelcomeViewController : UIViewController
@end
The GDWelcomeViewController is going to handle the React bridging, because that is the simplest option for our
Hello World app. We’ll be going back to improve this later.
#import "GDWelcomeViewController.h"
#import <React/RCTRootView.h>
#import <React/RCTBridgeDelegate.h>
#import <React/RCTBridge.h>

// Let this View Controller handle getting the URL for the JS
@interface GDWelcomeViewController () <RCTBridgeDelegate>
@end

@implementation GDWelcomeViewController

// Set self.view on the VC to be an RCTRootView
- (void)loadView
{
    RCTBridge *bridge = [[RCTBridge alloc] initWithDelegate:self launchOptions:@{}];
    self.view = [[RCTRootView alloc] initWithBridge:bridge
                                         moduleName:@"GitDawg"
                                  initialProperties:@{}];
}

// Use our bundled JS for now
- (NSURL *)sourceURLForBridge:(RCTBridge *)bridge
{
    NSBundle *gitdawgBundle = [NSBundle bundleForClass:GDWelcomeViewController.class];
    return [gitdawgBundle URLForResource:@"GitDawg" withExtension:@"js"];
}

@end
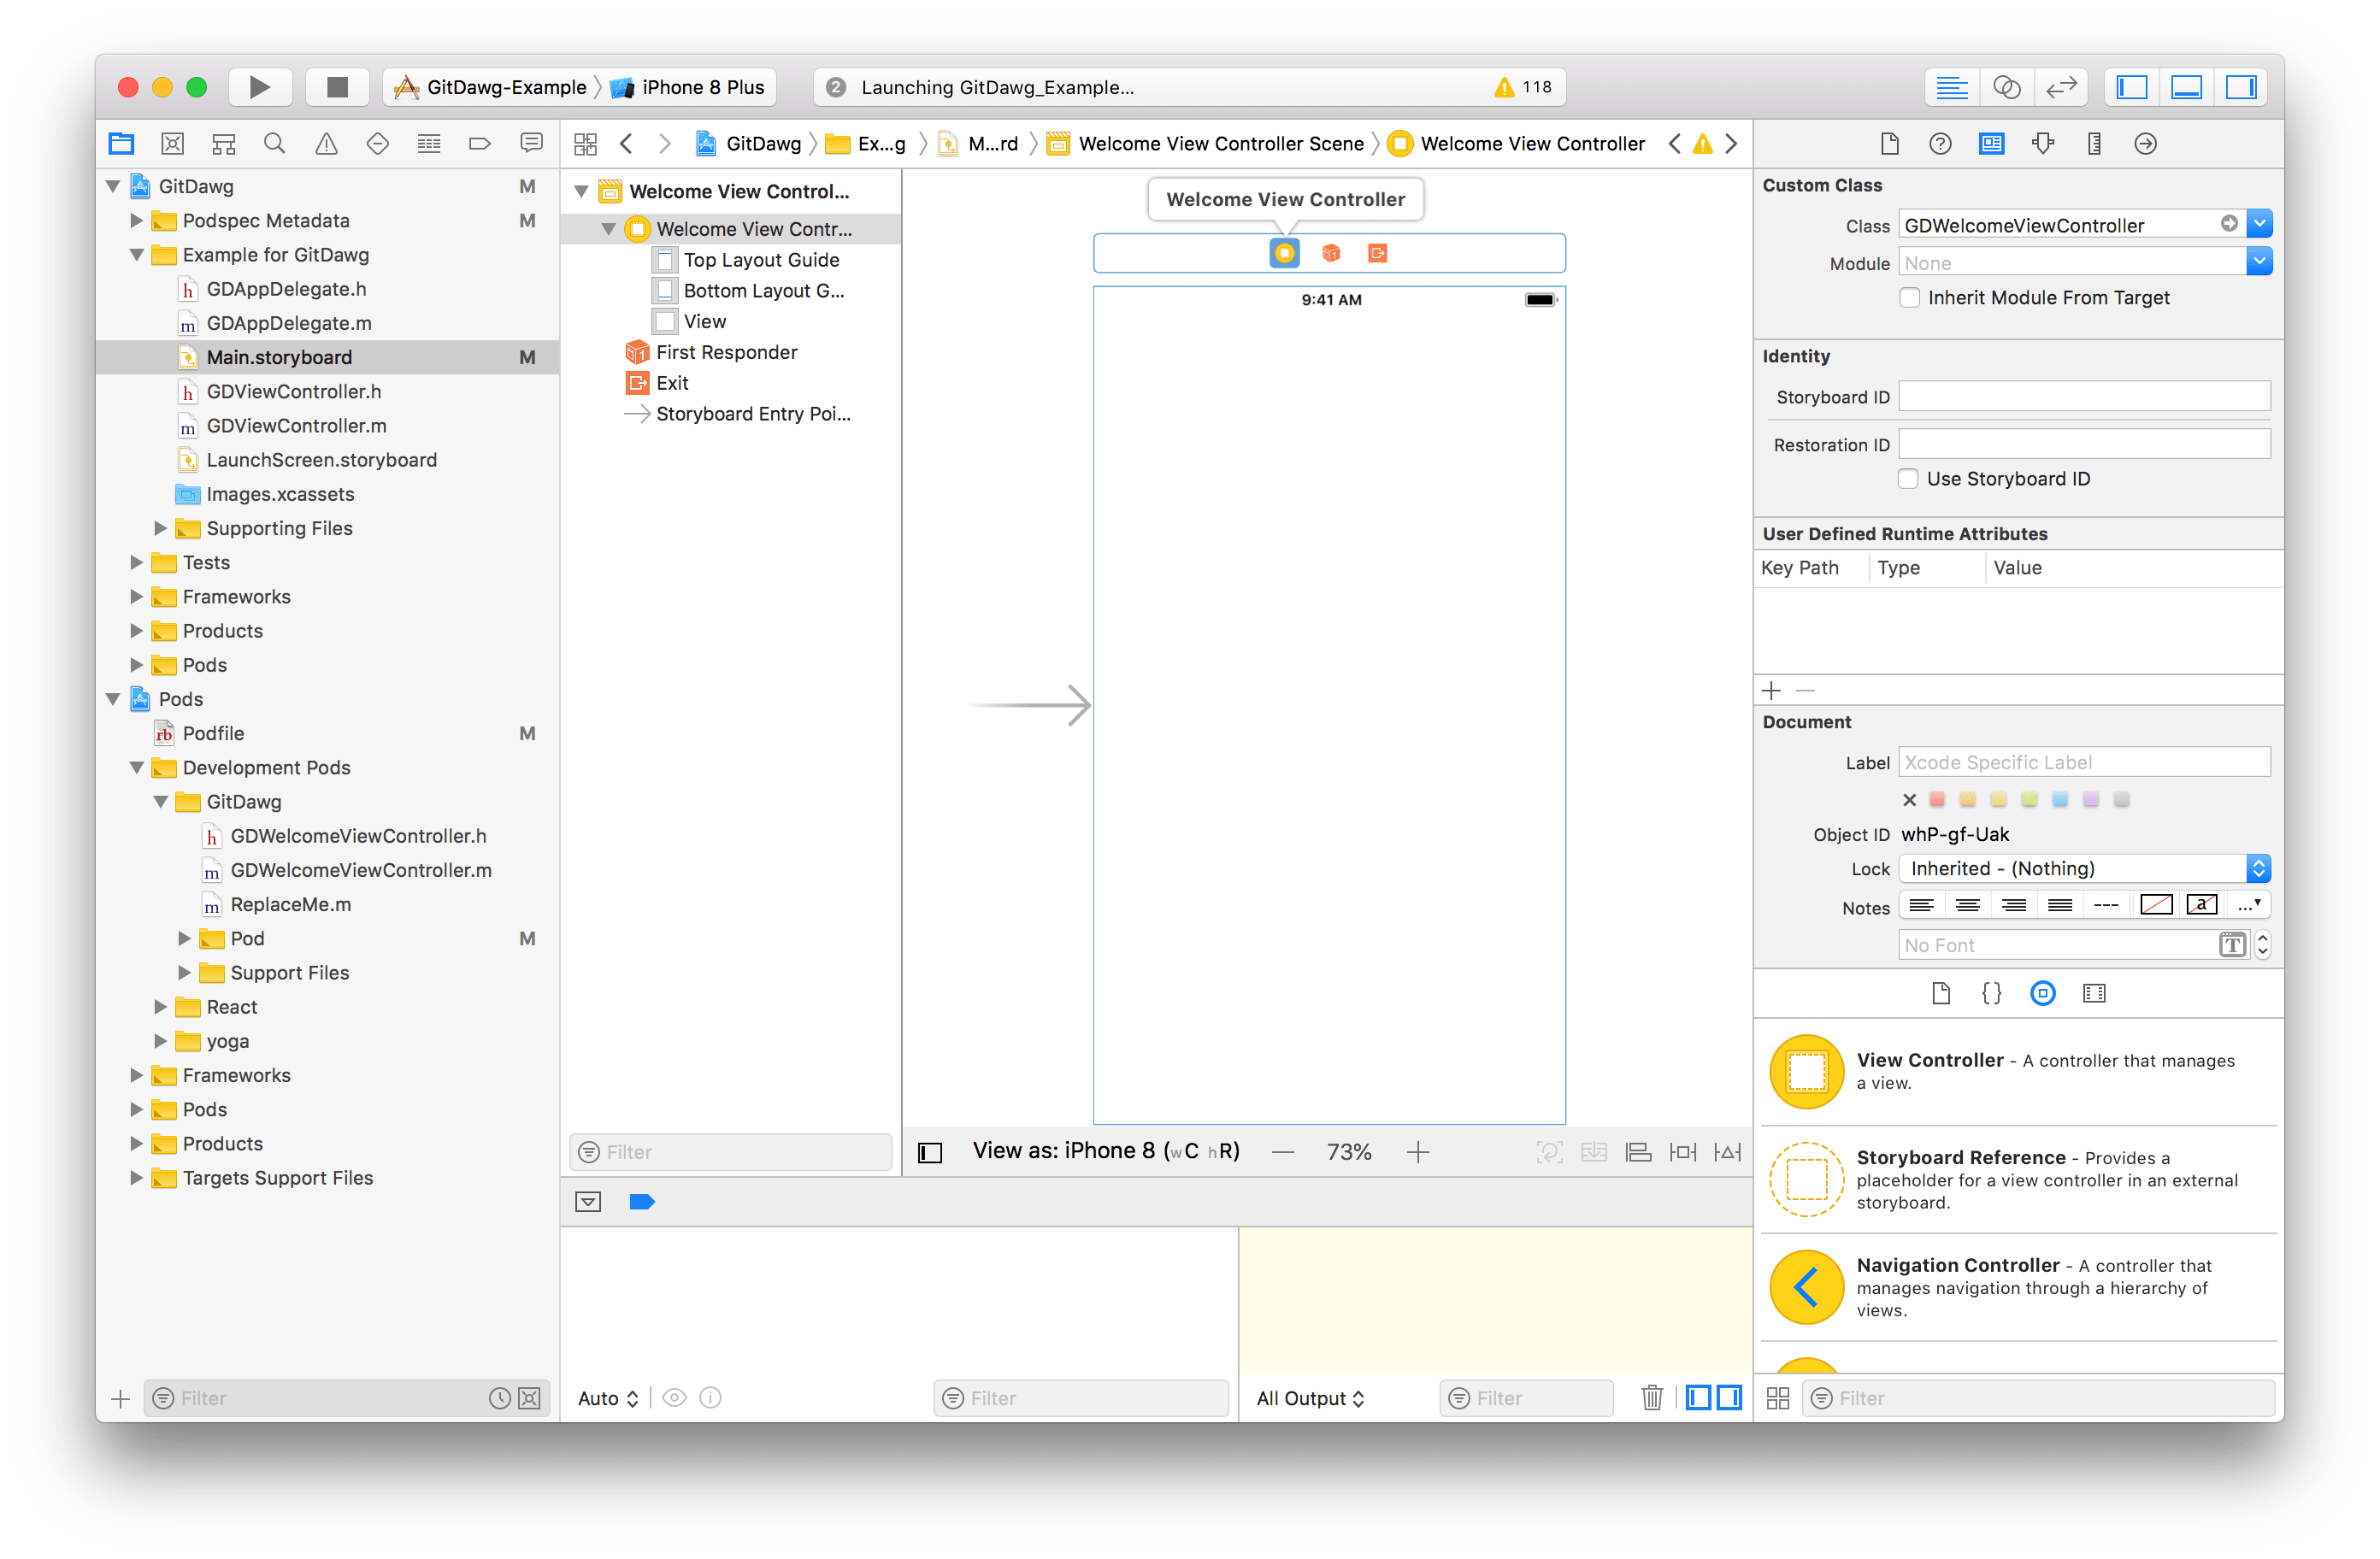
As the pod lib create template uses storyboards, you will need to open up the example app’s storyboard and
change the initial view controller to be a GDWelcomeViewController.
If you see a white screen on the app launches then this hasn’t been done.
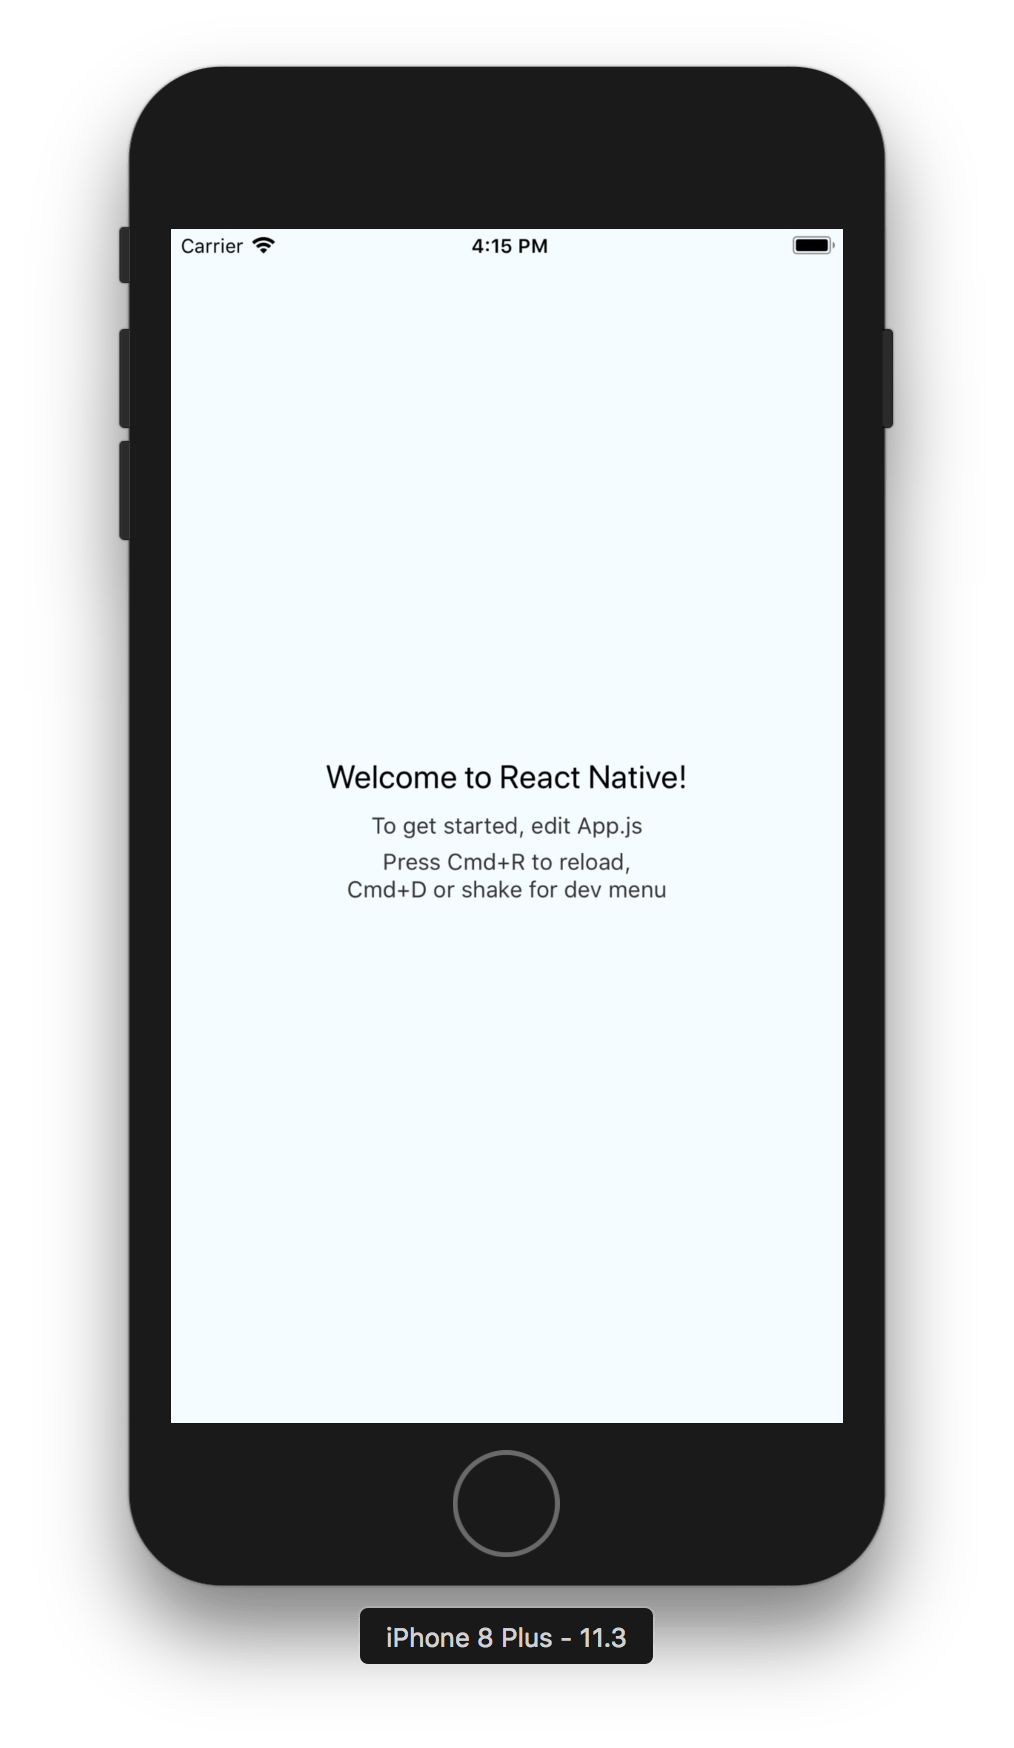
Run the app in the simulator, and you should get this screen:
This is the default screen from the React Native template, and it’s proof that everything has worked for our dev app.
Let’s take a second to re-cover what has happened to get to this point.
-
We used the
pod lib createtemplate to make a library repo -
We used
react-native initto make a React Native environment, which has the settings in the root and the source code insidesrc -
We’ve bundled the React Native code into our CocoaPod’s asset folder
-
We set up the Podspec for GitDawg, and then the Podfile for the example project to consume it
-
We added cocoapods-fix-react-native to hot-fix the native files
-
We added a UIViewController for the default screen from
react-native initto our CocoaPod, and ranbundle exec pod installto update the example project -
We changed the storyboard reference to point to the UIViewController from our Pod, and ran the simulator to see our welcome screen
This is a full run-through of how your Pod would look when integrated into your main app’s codebase. At this point you have a unique, isolated app which is going to be your development environment. In our case this app is a menu of different root screens and admin flags.
—
OK, let’s go take this and migrate it into GitHawk. This is our end-goal:
Our setup is going to be different here because we can’t rely on React Native coming from the file-system, as we want to make sure our app has no hint of JS tooling. So we will use CocoaPods to handle downloading and setting up our versions of the React Native libraries. As of 0.54.x, that is React and Yoga.
We want to have a local copy of the JSON version of Podspecs for each of these. They can be generated from the
Podspecs using bundle exec pod ipc spec [file.podspec]. Let’s generate one for React:
$ cd GitDawg/node_modules/react-native/; pod ipc spec React.podspec
It will output a bunch of JSON to your terminal. This is perfect. Let’s move that text to a file on your desktop.
$ pod ipc spec React.podspec > ~/Desktop/React.podspec.json
For the yoga podspec, you should just grab our version, it’s not worth me explaining all the details why, other than the PR I made to fix a bug isn’t shipped in 0.54 so run:
curl https://raw.githubusercontent.com/artsy/emission/v1.5.0/externals/yoga/yoga.podspec.json > ~/Desktop/yoga.podspec.json
You should now have two JSON files in your Desktop. Grab them, move them into the Local Pods folder inside
GitHawk. It should already have a few Podspecs.
$ cd ../../../ # Or however it takes to get back to the project root

# Move any podspec.json into the Local Pods folder
$ mv ~/Desktop/*.podspec.json "Local Pods"
Modify their Gemfile to include cocoapods-fix-react-native:
source 'https://rubygems.org'

gem 'cocoapods', '~> 1.4.0'
+ gem 'cocoapods-fix-react-native'
Then run bundle install. Next we need to add GitDawg, and our custom Podspecs to the Podfile:
source 'https://github.com/CocoaPods/Specs.git'

# Local Pods w/ custom changes
pod 'SwipeCellKit', :path => 'Local Pods/SwipeCellKit'
pod 'GitHubAPI', :path => 'Local Pods/GitHubAPI'
pod 'GitHubSession', :path => 'Local Pods/GitHubSession'

+ # React Native Support
+ plugin 'cocoapods-fix-react-native'
+ pod 'GitDawg', :path => '../GitDawg'
+ pod 'React', :podspec => 'Local Pods/React.podspec.json'
+ pod 'yoga',  :podspec => 'Local Pods/yoga.podspec.json'

target 'Freetime' do
Then run $ bundle exec pod install. That should grab React Native for you. Unlike inside GitDawg, CocoaPods will
download the source code from the internet. :podspec only tells CocoaPods where to find the Podspec, but it will
still download code externally.
Open up the Xcode Workspace - open Freetime.xcworkspace, and we’re gonna make the code changes - it’s all in one
file. Open the file RootNavigationManager.swift (it’s in Classes/Systems) and add a new import at the top for
GitDawg:
import UIKit
import GitHubAPI
import GitHubSession
+ import GitDawg
Then add our new view controller by replacing the bookmarks view controller on line 78.
        tabBarController?.viewControllers = [
            newNotificationsRootViewController(client: client),
            newSearchRootViewController(client: client),
+            GDWelcomeViewController(),
-            newBookmarksRootViewController(client: client),
            settingsRootViewController ?? UIViewController() // simply satisfying compiler
        ]
That should get you to the same point as we were in the dev app. Now when you run the app, log in and hit the place where the bookmarks icon used to live. Tada.
So what did we do? First, we added GitDawg, React and Yoga as dependencies in GitHawk’s Podfile to get them installed. Then we switched to using GitDawg’s native view controller in 2 lines of code. No JavaScript in GitHawk, little faffing overall.
This is how all our view controllers are exposed and used in production.
What now?
We’ve now got a successful deploy of our React Native Pod into an external app. However, we need to make some changes in GitDawg now to start making it possible to develop efficiently.
We will need to:
-
Make a singleton to handle setting up React Native between all potential UIViewControllers
-
Use the React Native Packager to get runtime editing support
Move your terminal back to the GitDawg folder. We’re going to make a class that represents our library, GitDawg
$ touch Pod/Classes/GitDawg.h Pod/Classes/GitDawg.m
Then we need to re-run $ bundle exec pod install in the Example folder to get it in Xcode. Open up the Xcode
workspace for GitDawg and let’s fill in these files. These files are based on AREmission.h and
AREmission.m. For us, in a production app, AREmission has a few key responsibilities:
-
Pass through the non-optional environment variables to expose in JS
-
Create and retain the React Native bridge
-
Set up the native modules so that we React Native can communicate with the host app
For this tutorial we don’t need all of these responsibilities, but we will handle the second one.
For the header file, GitDawg.h:
#import <Foundation/Foundation.h>
#import <React/RCTBridge.h>

NS_ASSUME_NONNULL_BEGIN

/// The RN library API
@interface GitDawg : NSObject

/// The way in which we communicate with React Native
@property (nonatomic, strong, readonly) RCTBridge *bridge;

/// The single instance of a GitDawg
+ (instancetype)sharedInstance;
+ (void)setSharedInstance:(GitDawg *)instance;

/// Pass in nil for a packagerURL to indicate this is in release mode
- (instancetype)initWithPackagerURL:(nullable NSURL *)packagerURL NS_DESIGNATED_INITIALIZER;
- (instancetype)init NS_UNAVAILABLE;

@end

NS_ASSUME_NONNULL_END
And for the implementation file GitDawg.m:
#import "GitDawg.h"

@interface GitDawg() <RCTBridgeDelegate>
@property (nonatomic, copy) NSURL *packagerURL;
@end

@implementation GitDawg

static GitDawg *_sharedInstance = nil;

+ (void)setSharedInstance:(GitDawg *)instance;
{
    _sharedInstance = instance;
}

+ (instancetype)sharedInstance;
{
    NSParameterAssert(_sharedInstance);
    return _sharedInstance;
}

- (instancetype)initWithPackagerURL:(NSURL *)packagerURL
{
    self = [super init];

    _packagerURL = packagerURL;
    _bridge = [[RCTBridge alloc] initWithDelegate:self launchOptions:@{}];

    return self;
}

- (NSURL *)sourceURLForBridge:(RCTBridge *)bridge
{
    return self.packagerURL ?: self.releaseBundleURL;
}

- (NSURL *)releaseBundleURL;
{
    return [[NSBundle bundleForClass:self.class] URLForResource:@"GitDawg" withExtension:@"js"];
}

@end
Then change your GDWelcomeViewController.m to use the shared GitDawg.
 #import "GDWelcomeViewController.h"
+#import "GitDawg.h"
 #import <React/RCTRootView.h>
-#import <React/RCTBridgeDelegate.h>
-#import <React/RCTBridge.h>

 - (void)loadView
 {
-    RCTBridge *bridge = [[RCTBridge alloc] initWithDelegate:self launchOptions:@{}];
+    RCTBridge *bridge = [GitDawg sharedInstance].bridge;
     self.view = [[RCTRootView alloc] initWithBridge:bridge
                                              moduleName:@"GitDawg"
                                     initialProperties:@{}];
 }

-// Just use our packaged JS for now
-- (NSURL *)sourceURLForBridge:(RCTBridge *)bridge
-{
-    NSBundle *emissionBundle = [NSBundle bundleForClass:GDWelcomeViewController.class];
-    return [emissionBundle URLForResource:@"GitDawg" withExtension:@"js"];
-}
-
 @end
We use the UIAppDelegate callback to set up our React Native bridge (you want this ready as fast as possible
normally) so edit Example/GitDawg/GDAppDelegate.m
 #import "GDAppDelegate.h"
+#import <GitDawg/GitDawg.h>

 @implementation GDAppDelegate

 - (BOOL)application:(UIApplication *)application didFinishLaunchingWithOptions:(NSDictionary *)launchOptions
 {
-    // Override point for customization after application launch.
+    NSURL *packagerURL = [NSURL URLWithString:@"http://localhost:8081/src/index.bundle?platform=ios"];
+    GitDawg *dawg = [[GitDawg alloc] initWithPackagerURL:packagerURL];
+    [GitDawg setSharedInstance:dawg];
+
     return YES;
 }
These changes give you the ability to switch between a dev mode and a release mode. Consider that React Native just runs your JavaScript, the source of that could be anything, including from a local dev server. Well, almost.
Because of Apple’s HTTP security, you cannot connect to localhost in an app by default. To fix this, open up
GitDawg-info.plist and right-click to add a new row. Paste in NSAppTransportSecurity as the name, and Xcode will
switch it to “App Transport Security Settings”. Hit the + and add “Allow arbitrary loads” then set it to true.
From here: run the GitDawg app and you should see a red screen. This will be telling you to start the React Native
Packager. Let’s do that. From the root of the GitDwag repo run $ yarn start. This will start up a server. Once it
says “Metro Bundler Ready.” you can go back into your simulator for GitDawg and hit the reload button at the bottom.
That’s it.
We’re done.
So, there’s obviously a lot more to learn here. You’ve successfully set up a Pod that you can deploy to an app. To make a real version you’d need to do a bit more process like creating a repo, and making tags.
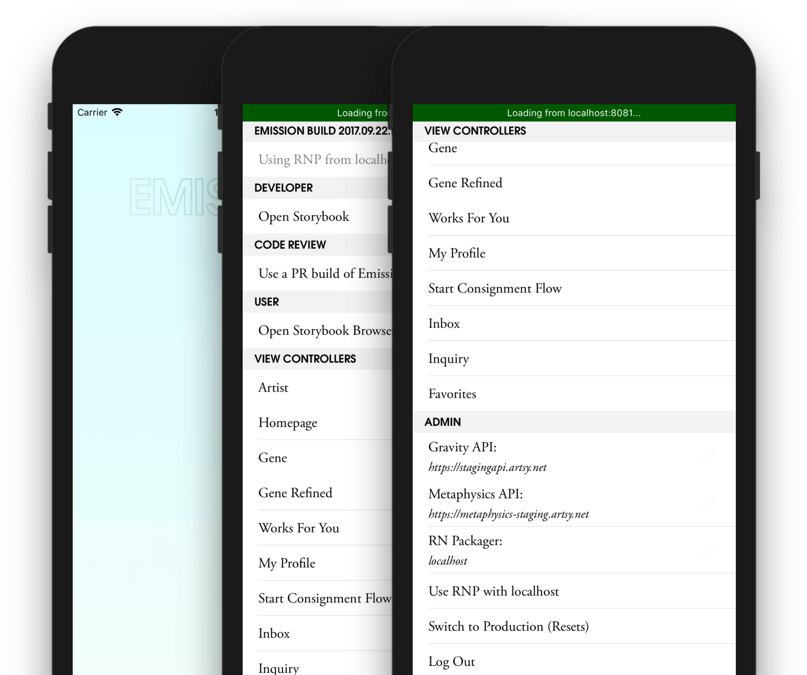
We use our root view controller in Emission to trigger loading any of our view controllers, in different states. We also mix that with some admin options, the ability to run someone’s PRs and storybooks.
So good luck! Something like this probably easily scripted, but there’s a lot of value in understanding how every piece comes together. So let me know if you make something cool - we’ve been using this structure for 2 years now and I think it’s the right way to integrate React Native into an existing complex app. It keeps your JS tooling in a completely different repo from your iOS tooling.