It was only three months ago that I came to the conclusion of just how much time I had wasted on code compilation cycles, once I started to play with Injection for Xcode. I still feel guilt about the time I wasted. However, I’m trying to turn that into something constructive. In order to do that, I need to have a solid understanding of the fundamentals on how Injection For Xcode works.
Ash says one of the best ways to learn is to teach. So I’m going to try take you through a guided tour of the code-base. You need some pretty reasonable Objective-C chops to get this, but anyone with an app or two under their belt should be able to grok it.
You might find it easier to clone the repo and have Xcode open along-side this article, to quickly do that, run these commands to put it in a temporary folder via the terminal:
cd /tmp/
git clone https://github.com/johnno1962/injectionforxcode TempInjection
open TempInjection/InjectionPluginLite/InjectionPlugin.xcodeproj/
A note on code style
I am of the _why camp of programming - the code we are spelunking through can feel foreign to modern Objective-C, and it’s not got tests. @Johno1962 described it to me as being like 1997’s Objective-C. The end result of all this code is beautiful, whether the code is - is a matter of perspective. I’m super happy it exists.
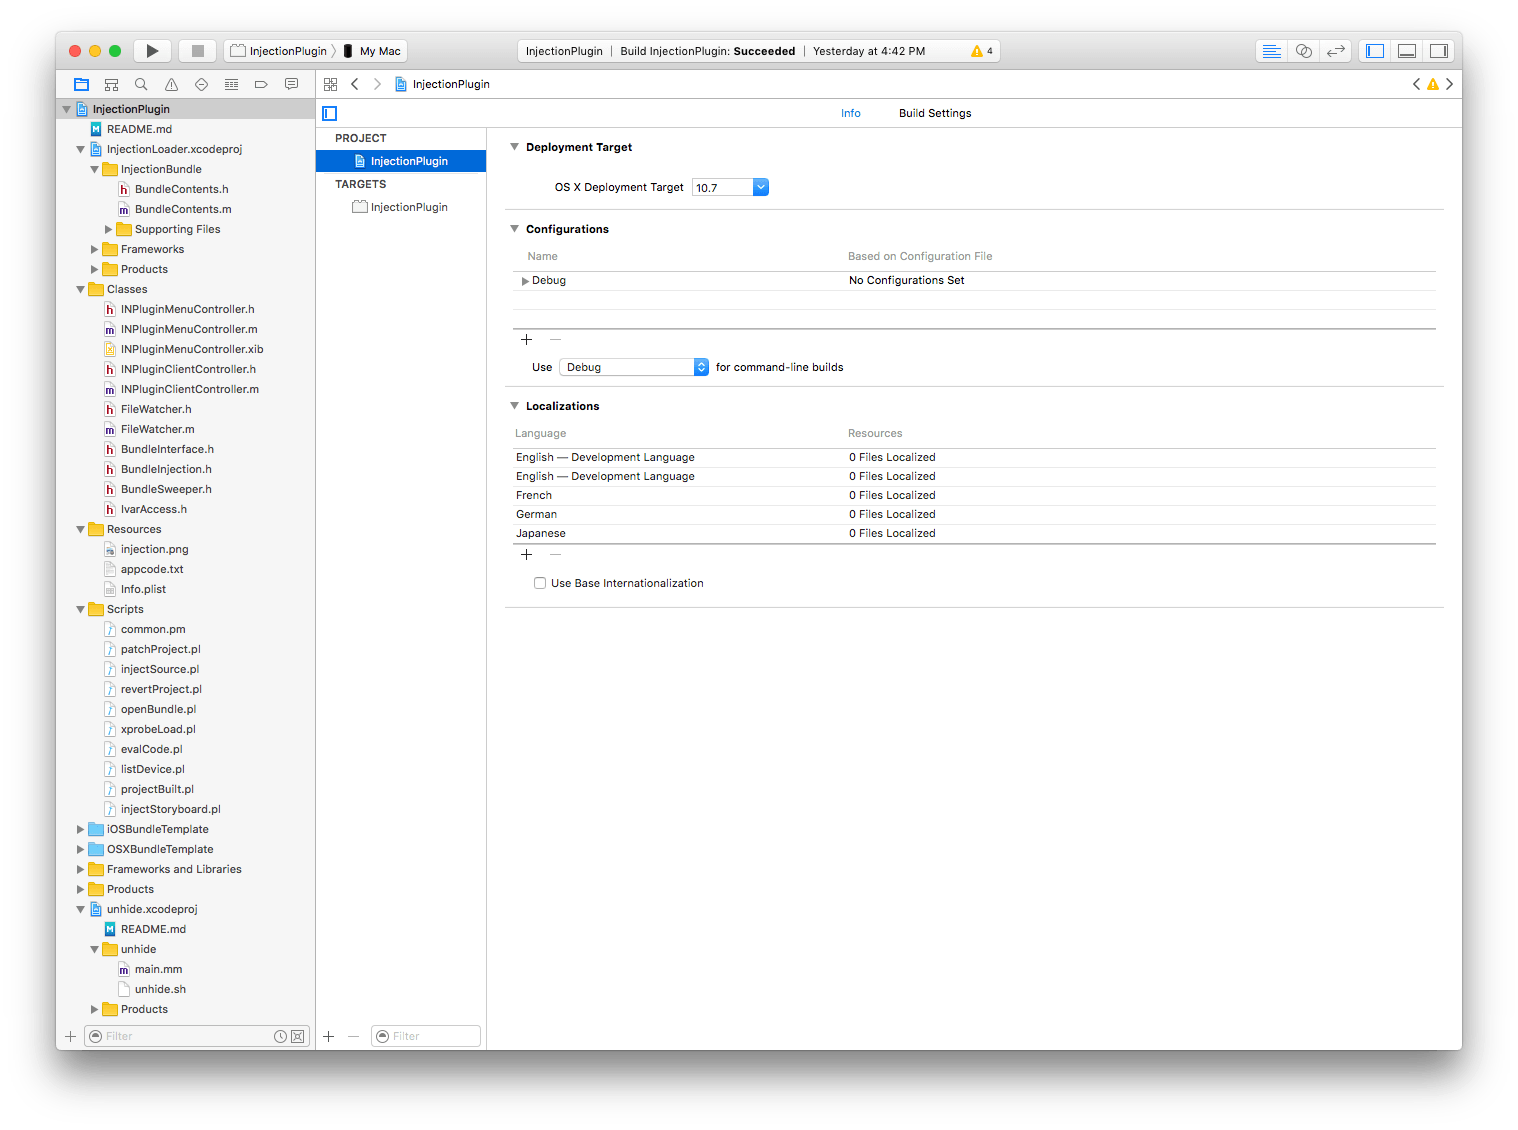
Targets
- InjectionPlugin - The user facing Xcode plugin
- InjectionLoader - A Bundle used to skip patching a project for injection.
- iOSBundleTemplate - A folder to a reference implementation of a iOS Project
- OSXBundleTemplate - Same but for OSX Project
- unhide - A command line tool that extracts symbols from a Swift Framework
Implementation Order
I want to go through the code-base from the perspective what happens when it:
- Loads up inside Xcode.
- Recieves a call to inject.
Launch
All Xcode plugins have the exact same launch process, you define a class in the info.plist, this class, INPluginMenuController, gets + pluginDidLoad: called. This is where you set up a shared instance, and can keep a reference to your bundle.
This triggers the interesting stuff in applicationDidFinishLaunching: this sets up the user interface from a nib file, which DIs in a lot of the instance variables, and will send you to get a new version of Injection if it fails. It then sets up the menu ( note: interesting use of c-structs here ) and starts a TCP server, then registers for when a NSWindow becomes active.
Server
The server is a c TCP socket, prior to digging in here, I’d never needed to see one. I see a lot of references to Android injection, so I assume the low-level choice in a socket was so the same code can do both platforms.
- (void)startServer {
    struct sockaddr_in serverAddr;

    serverAddr.sin_family = AF_INET;
    serverAddr.sin_addr.s_addr = INADDR_ANY;
    serverAddr.sin_port = htons(INJECTION_PORT);

    int optval = 1;
    if ( (serverSocket = socket(AF_INET, SOCK_STREAM, 0)) < 0 )
        [self error:@"Could not open service socket: %s", strerror( errno )];
    [...] // skipping a bunch of error handling
    else if ( listen( serverSocket, 5 ) < 0 )
        [self error:@"Service socket would not listen: %s", strerror( errno )];
    else
        [self performSelectorInBackground:@selector(backgroundConnectionService) withObject:nil];
}
Assuming everything went well, then a Bonjour service is created advertising the socket on the network. This then moves to a background thread and starts a infinite runloop checking for new connections on the socket every 0.5 seconds.
Here is it running in Bonjour Browser. So, what does this server do? That’s handled inside INPluginClientController. It uses a MAC address so that you can have multiple non-competing services running on the same network.
At its simplest, the server exists to send messages between running multiple applications and the injection plugin. We’ll get back to what the server does later.
Inside Xcode
The plugin will keep track of the key editor window, this is done by making sure the window’s controller is of the class IDEWorkspaceWindowController and that it has a corresponding file.
That’s basically everything set up for the plugin now, until a user decides to start using Injection. So we’re going to move to what happens when you press ctrl + =.
On Preparing for Injection
The work starts at injectSource from INPluginMenuController.
The first thing it does is grab the current file, then saves it. It then checks what type of file it is, as only .m, .mm, .swift or .storyboard can be injected.
Next, it pulls out a reference to the currently running LLDB session, the console in the bottom of Xcode. It checks if the server has any active clients.
OK, to understand the next bit you need to understand what “unpatched injection” is. In order to support code injection, your app has to have some way to communicate back to the TCP server hosted in Xcode. This can be done either by including some source code in your project, or by adding it in at runtime. Including the source code, is “patching” your project to allow injection. It’s optional because of what comes next.
If there are no clients connected, then requests a pause from LLDB, allowing the plugin to send messages to the running app, it then waits a few microseconds to give the debugger chance to load. Once it’s loaded loadBundle: is called.
Injection then sends expr -l objc++ -O -- (void)[[NSClassFromString(@"NSBundle") bundleWithPath:@"/Users/orta/Library/Application Support/Developer/Shared/Xcode/Plug-ins/InjectionPlugin.xcplugin/Contents/Resources/InjectionLoader.bundle"] load] into the debugger. Causing the same code as the patch to exist inside your app. This code comes from the second target from the list at the top, and is hosted inside the plugin’s bundle (meta…).
With that verified, it’s ready to inject the source code.
Code Injection Compilation
If everything is good, and ready to go, and we’ve got confirmation that a client exists, Injection starts monitoring for file changes inside your Xcodeproject.
A lot of the code injection work is done inside perl scripts, another new language for me. OK, so, at the end of injectSource it runs injectSource.pl with an argument of the file to inject.
Note, a lot of ground-work for the perl scripts is done inside common.pm - which is a module the other scripts import.
It is the role and responsibility of this script to setup, maintain and amend an xcodeproject that compiles just the class that has changed into a new bundle. Luckily for me this is pretty well documented :D.
It starts out by copying a template xcodeproject (either iOSBundleTemplate or OSXBundleTemplate) into your current project directory. I add this to the .gitignore.
Next it pulls out the build settings for all these keys FRAMEWORK_SEARCH_PATHS HEADER_SEARCH_PATHS USER_HEADER_SEARCH_PATHS GCC_VERSION ARCHS VALID_ARCHS GCC_PREPROCESSOR_DEFINITIONS GCC_ENABLE_OBJC_EXCEPTIONS from your project, into the sub-project.
Next it determines how to handle code-signing on the app, as it supports both simulator and on-device, and you need to sign to run any code on a device.
After that, if needs to understand how to compile an individual file, it gets a reference to the build log dirs for the derived data for your app. They’re zipped files, so it unzips them and parses the log. Here’s an example of what compiling a single class from Eigen looks like (I’ve highlighted the useful bits). Internally, this is called the learnt db.
The learnt db is used to compile a class to be individually compiled into a injecting_class.o file, I can’t quite figure out where that file comes from though.
To wrap up the compilation it needs to take the compiled object injecting_class.o and statically link it to the bundle that is generated inside the sub-project. Here is the command line generation, building the script is a little bit more involved - but that’s generally because it’s trying to support a lot of user options. The main class that exists in the bundle is BundleContents.
The compiled bundle is then renamed so that you don’t have name clashes, it’s just incremental integers. My current sub-project I’m using for debugging looks like this:
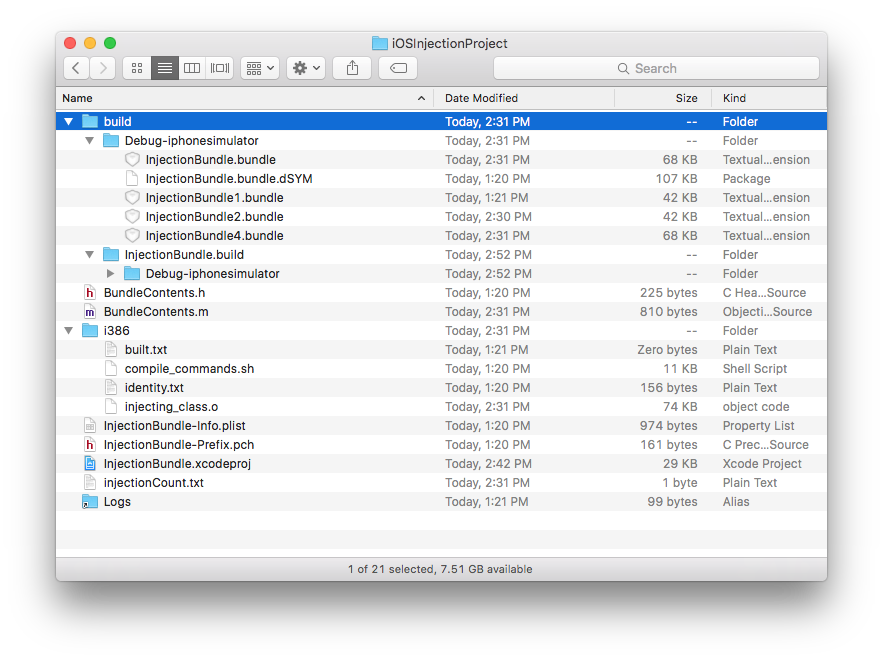
With the Logs dir being a symlink to the derived data folder.
With that done, it will include any nibs from compiling storyboards, and code-sign the bundle if it’s going to a device. Finally it prints out the new bundle path in so the monitoring script can work with it.
Script Monitoring
The script to create the Xcode project, amend it, and compile is done as a separate process. It’s done via the function popen. This is then monitored in background, listening for output lines that begins with <, >, !, % and ?. The one that we’re most interested in, is the ! operator which tells the server the filepath of the now compiled InjectionBundleX.bundle, in my most recent case, this looked like /Users/orta/dev/ios/energy/iOSInjectionProject/build/Debug-iphonesimulator/InjectionBundle4.bundle.
This tells the server running inside Xcode that it has a file to send to the clients.
How the server works
Alright, back to the INPluginClientController. Skipping over the option setting IBActions and RTF-formatted logging. We come to the initial connection responder: setConnection:.
So, this is where I ended up a bit out of my comfort zone. This isn’t a blog post about sockets and c though, so I’ll annotate what’s going on from the high level thoughout this connection setup function.
- Grab some the main client file from socket, then if it’s is an injection message, set the Injection console’s info label to that filepath, this is the
BundleContents.m. - Otherwise inject all objects from a storyboard (not too sure whats going on there TBH)
- The server asks the client for the app’s path e.g.
/Users/orta/Library/Developer/CoreSimulator/Devices/CDC9D8EF-AAAD-47F8-8D53-C3C69551E85A/data/Containers/Data/Application/1F636180-7113-406E-88F8-7E43EFAC13F6" - There’s some more communication around the app’s architecture.
- The app gets a badge with the client count on it, so you know it’s working.
- If checks if you want the File Watcher turned on.
From that point the server’s job is mainly to pass messages and files that come out of the scripts between the client and the host doing the compilation.
File Watcher
As an option you can set in the preferences toggles a File Watcher. I found a bunch of references to this in the code, so I wanted to at least dig into that. When you turn it on, any save will trigger an injection. This is done by looking for the folder that your project resides in, then using Apple’s file system event stream to monitor for save changes. Then when a new FS event is triggered, it re-injects that file. I bet it’s turned off by default as you’ll see errors when it’s not compilable.
Client-Side
We’ve hand-waved though the client-side of the app during the patching stage of installation, but to understand both parts of the system we need to cover the client side in a bit more depth. There’s two aspects to it, the initial bundle/patch and incremental bundles that contain the new compiled code.
Client Setup
To understand this, we need to grok a 1,200 LOC header file :D, it has a few responsibilities though. So we can try work through those, to BundleInjection.h. Interesting note, when you are patching your application - you’re actually making a link to a copy of this file inside your /tmp/ dir.
#ifdef DEBUG
static char _inMainFilePath[] = __FILE__;
static const char *_inIPAddresses[] = {"10.12.1.67", "127.0.0.1", 0};

#define INJECTION_ENABLED
#import "/tmp/injectionforxcode/BundleInjection.h"
#endif
Client Socket Connection
Like the server, this has two responsibilities - using Bonjour to find the server, and raw socket communication. There is nothing unique about the Bonjour mutlicast work, so I’m skipping that. Once the socket knows how to establish a connection between processes + bundleLoader is called on a background thread.
So, what does bundleLoad do?
- It checks if it’s a new Injection install in the app, if so it sets up INParameters and INColors for tunable parameters.
- It then determines the hardware architecture for it to be sent to the server for compilation later.
- Attempt to connect to the server, 5 times.
- If it succeeds, write the location of the
BundleInjectionfile to the server. Triggering the first of the socket work on the server. - Expect a response of the server’s version of
BundleInjection - If the bundle is compiling storyboards on iOS, swizzle some of the UINib init functions.
- Pass the home directory of the app to the server.
From there the socket goes into runloop mode on it’s on thread.
Client Socket Runloop
As with server monitoring, the client listens for strings that begin with special prefixes:
~- Injects, then Re-creates the app degelate + view controller hierarchy./- Loads the bundle path that was sent in.>- Accepts a file or directory to be sent through the socket.<- Sends a requested file or directory to through the socket.#- Receives anNS/UIImagevia NSData for Tunable Parameters.!- Logs to console- Otherwise, assume it’s another Tunable Parameter.
Loading the Bundle
When the new bundle is loaded it triggers this code:
+ (void)load {
    Class bundleInjection = NSClassFromString(@"BundleInjection");
    [bundleInjection autoLoadedNotify:$flags hook:(void *)injectionHook];
}
Which does the job of letting the running app know that instances have been updated with new code. Injection does three things:
- A global NSNotification for .
- Sends all instances of classes injected a message that they’ve been injected.
- Sends all classes that have been injected a message they’ve been injected.
Which is where this goes from “complex”, to “I would need to study up to do this.” Let’s start of quoting the README that @Johno1962 and I worked on for a while.
It can be tough to look through all of the memory of a running application. In order to determine the classes and instances to call the injected callbacks on, Injection performs a “sweep” to find all objects in memory. Roughly, this involves looking at an object, then recursively looking through objects which it refers to. For example, the object’s instance variables and properties.
This process is seeded using the application’s delegate and all windows. Once all the in-memory reference are collected, Injection will then filter these references to ones that it has compiled and injected. Then sending them the messages referenced in the callbacks section.
If no references are found, Injection will look through all objects that are referred to via sharedInstance. If that fails, well, Injection couldn’t find your instance. This is one way in which you may miss callbacks in your app.
Class + Method Injections
So how does it pull that off? Calling NSBundle’s - load here, calls the load function to call on all classes inside that new bundle. This triggers the load function from the InjectionBundle that is auto-generated during the Injection stage. Here’s what one of mine looks like:
@interface InjectionBundle3 : NSObject
@end
@implementation InjectionBundle3

+ (void)load {
    Class bundleInjection = NSClassFromString(@"BundleInjection");
    [bundleInjection autoLoadedNotify:0 hook:(void *)injectionHook];
}

@end
This is generated from the injectSource.pl script here] [bundleInjection autoLoadedNotify:$flags hook:(void *)injectionHook]; . It also comes with another function,
int injectionHook() {
    NSLog( \@"injectionHook():" );
    [InjectionBundle3 load];
    return YES;
}
What we care about is &injectionHook which gets passed to autoLoadedNotify as a pointer to a function. Oddly enough, I’m a tad confused about the fact that the injection hook contains a reference to the function that calls it, but lets roll with it for now. Perhaps it’s never actually called, I asked -it’s for Android support, and isn’t used.
So, we’ve had a fairly typical NSBundle - load load our classes into the runtime. This triggered the InjectionBundle.bundle to have it’s classes created, and the first thing it does is pass a reference back to the BundleInjection class instance for the injectionHook function that calls the load on the new classes.
Note: terminology changes here, I’ve talked about a bundle, but now that the code is in the runtime, we start talking about it as a dynamic library. These bundles contain 2 files Info.plist, InjectionBundleX - so when I say dynamic library, I’m referring to the code that is inside the bundle that is linked ar runtime (and thus dynamically linked in.)
Next, Injection creates a dynamic library info struct and uses dladdr to fill the struct, based on the function pointer. This lets Injection know where in memory the library exists. It’s now safe in the knowledge that the code has been injected into the runtime. Injection will re-create the app structure, if requested - like when it receives a socket event of ~.
We’re getting into Mach-O binary APIs, so put on your crash helmets. Injection is going to use the dynamic library info, and ask for the Objective-C __classlist via getsectdatafromheader for the new dynamic library. This works fine for Swift too, it mostly has to be exposed to the Objective-C runtime. If you want to understand more about what this looks like, read this blog post from Zynamics. Injection then loops through the classes inside the library, via the most intensely casted line in of code in here: Class *classReferences = (Class *)(void *)((char *)info.dli_fbase+(uint64_t)referencesSection);.
These classes are then iterated though, and new implementations of functions are swizzled to reference the new implementations. With Swift you have no guarantee that the methods are dynamic so all their vtable data is switched. If you don’t know what a vtable is check this page on Wikipedia.
Once all of the classes have had their methods switched, the class table is updated to ensure that functions that rely on the class table ( e.g. NSClassFromSelector ) return the new values.
With valid class tables, and the newly injected functions added. Injection starts the memory sweep to send updated notifications.
Class + Instance Notifications
At this point Injected does a run through the new class list again, if that class responds to the selector + injected it runs it. It then does a check to see if the class’s instances reponds to - injected if it does, it looks to see if it has any instances of the objects in it’s liveObjects array. If the array hasn’t been set up, then it needs to do a full memory sweep.
Injection has an Xprobe-lite included inside it. This lives in BundleSweeper.h. The quote opening this notification section above gave the start away, BundleSweeper looks at the app delegate ( or a Cocos2D director object) and then starts to recursively look at every object that it’s related to. This is done by adding a bwseep function to NSObject then individually customizing it for known container classes, and “reference” classes e.g NSBlock, NSData, NSString, NSValue etc. The bsweep function adds itself to the shared list of “objects seen”, checks for an it being a private class or a transition, if it’s not then it loops through the IvarList and runs bsweep on all of those. With that done, it casually tests to see if there are any weakly held objects that tend to use common selectors.
Let that simmer for a bit ( I jest, it’s super fast. ) and then you have almost every object in your object graph being told that they’ve been updated. I say almost because of the above caveat. Can’t find all objects this way. Singletons that never are referenced strongly from another object inside the findable graph wouldn’t get a notification this way for example.
With all the fancy class an instance nofications sorted, there is a good old reliable NSNotification - here. Which is what I based my work on for Eigen, super simple, extremely reliable and great for re-use.
 .
.
Phew!
So, this covered the majority of how Injection for Xcode works. It’s a really powerful tool, that can vastly improve your day-to-day programming. When I showed a draft of this post to @Johno1962 he reminded me that Diamond - his Swift scripting improvement tool, had it’s own version of Injector inside that, that is much simpler and a easier read at 120 LOC. However, can’t understand the future without understanding the past.
A lot of the most complicated code is around:
- The client-server architecture, and about passing files/folders between the running application and the Xcode plugin.
- The recursive memory sweeping required to get a notification that it’s done.
The actual work involved in doing the injection, and replacing the classes isn’t particularly complicated, and is easy to understand without c/Mach-o domain knowledge. It’s making sure the environment is set up and supporting useful features like Storyboards, Android via Apportable, ARC and no-ARC, 32bit vs 64bit and iOS vs Mac where things start to become more complex.
As of Xcode 8, Xcode Plugins are on the way out, though there are hacks to work around the system to install them, doing so might not be the smartest of moves yet. It’s hard to see where the future lies here. However,

So we’ll see in a few months.
If you’re interested in this kind of stuff, follow @Johno1962 on Twitter, he’s @Injection4Xcode - Chris Lattner follows him, so you know it’s good stuff. He’s always got some project that is pushing a boundry or two.